Source Analyzer:
-
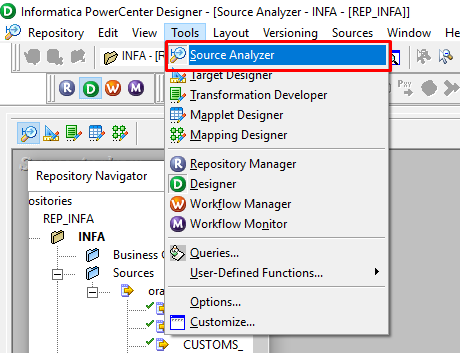
- Go to tools menu >select Source Analyzer as shown in below screenshot.
-
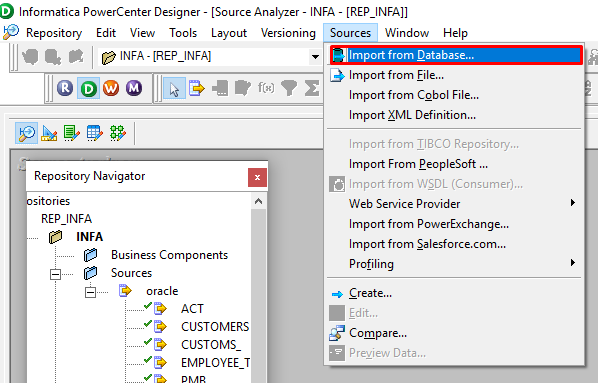
- Go to sources (from menu bar) To import the source tables from database. As shown in below screenshot.
-
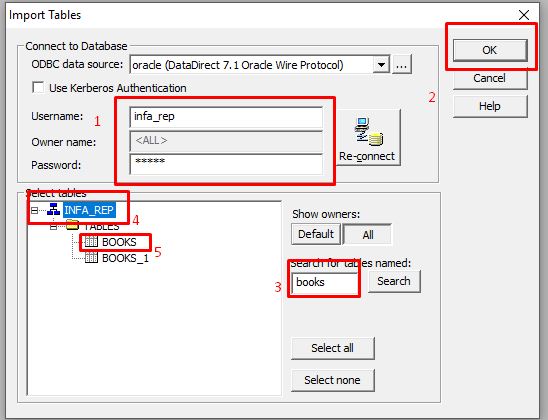
- Provide the user ID and Password to connect to the DB and to import required tables.
Target Designer:
-
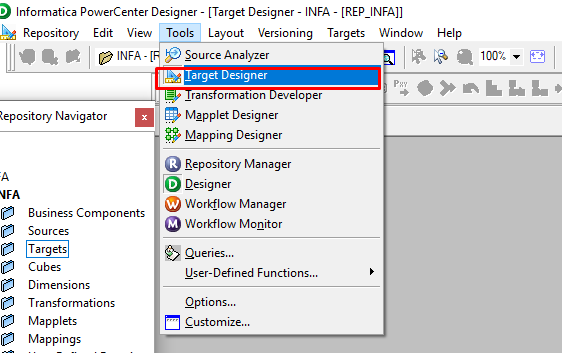
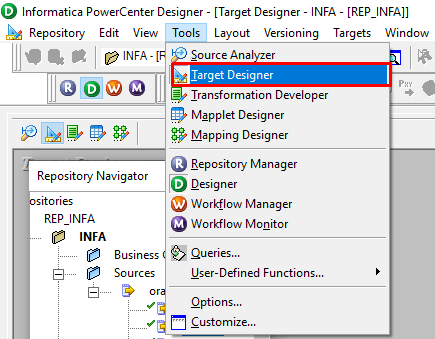
- Go to tools menu >select Target Designer as shown in below screenshot.
-
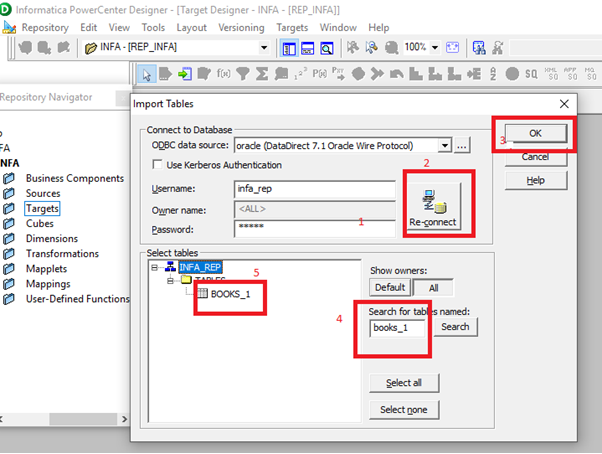
- Go to target (from the menu bar) To import the target tables from the database. As shown in below screenshot.
- Provide the user ID and Password to connect to the DB and to import required tables.
-
- Will see the Source and Targets are imported from our data base.
- Drag the source table from source analyser, target table from target analyser in Designer page.
Mapping Designer:
-
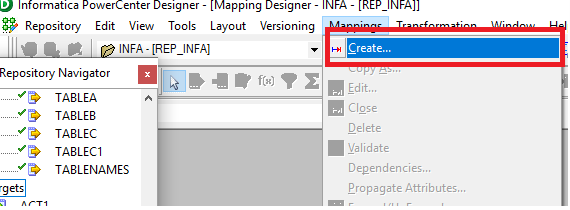
- Go to Mapping> (from tools bar) to create new Mapping as shown below screenshot.
-
- Create New Mapping with respective name E.g. (m_booksmapping), m_ is naming convention for mapping creation.

-
- Drag and Drop target and source in mapping from the respective Windows in a designer as shown below screenshot.
- Connect all the column fields from source to source qualifier in mapping designer as shown in below screen shot.

-
- Connect all the column names from source qualifier to target in mapping designer as shown in below screenshot.

Save mapping.
Workflow Manager:
-
- Go to Work Flow manager –>to create workflow and task for the session for the mapping process.

-
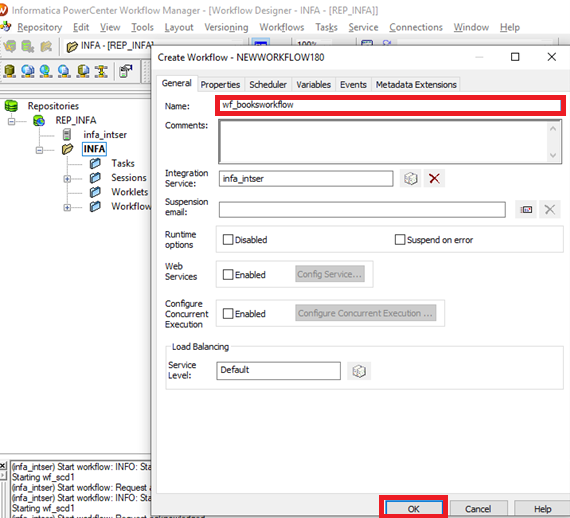
- Create new workflow: Give the name to workflow with given naming convention wf_booksworkflow and then click on ok.
-
- Created workflow will be shown in below screen shot.

Session:
Go to Work Flow manager à to create the task for the session in the mapping process.

-
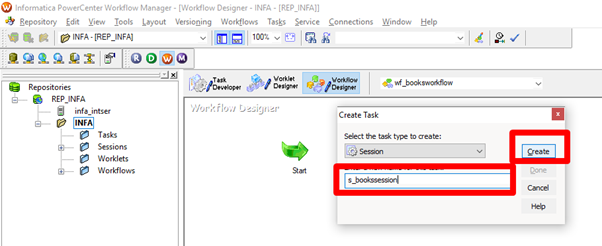
- Create new Session: Give a name to session with given naming convention s_bookssession and then click on
-
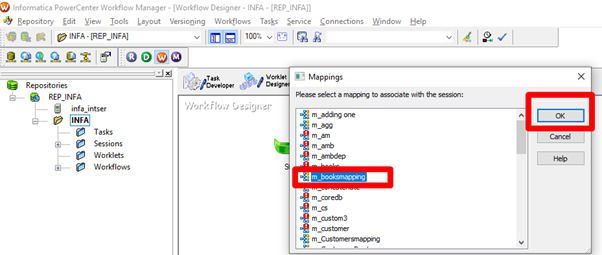
- After creating session for a mapping, it will allow to choose respective mapping click on ok.
-
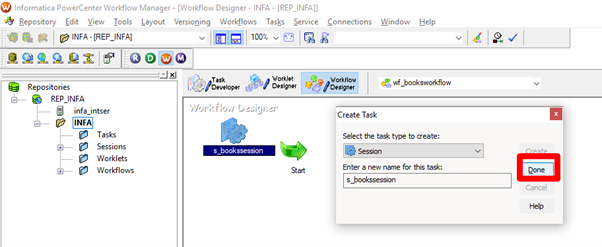
- Now we will get a window for the created task as shown below, click on done.
EDIT TASK:
We have to edit task such that make sure all the source and targets must be connected to the respective database as shown in below screenshot and click on OK.
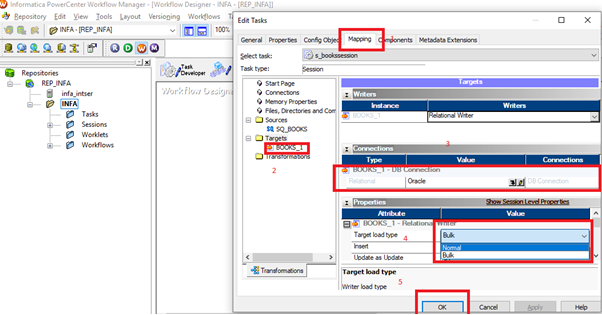
NOTE: If the target table contains any primary keys then target load type should not be Bulk.
-
- Create a link between session and worklet as shown in below screenshot. Save the workflow designer.
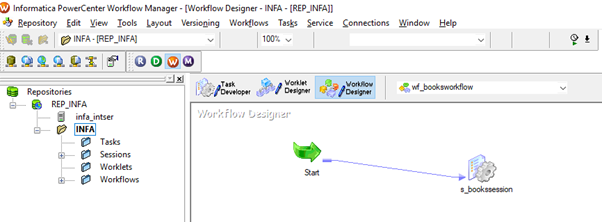
-
- Go to workflows and click on start workflow to start workflow for the mapping process.
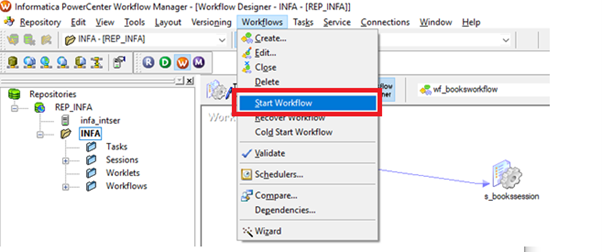
Work Flow Monitor:
-
- Click on workflow monitor to see the output of mapping result (status of mapping should be succeeded)

-
- To check the task Details, right click on the session to get run properties. Please find the below screenshot.

OUTPUT of Sample Mapping:
-
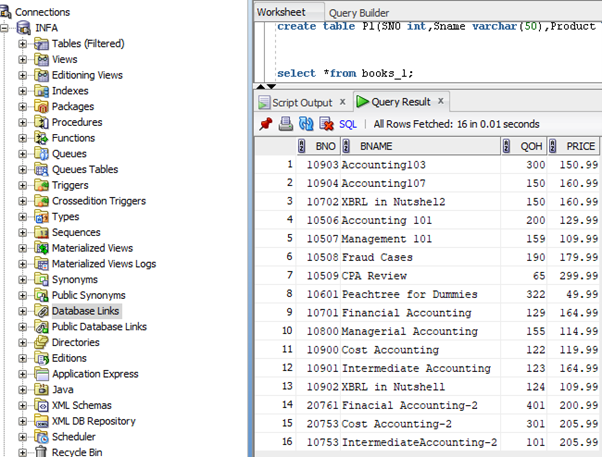
- Source Table Before Mapping Process
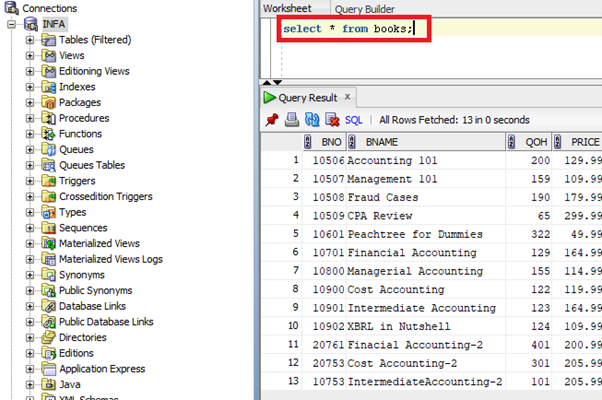
-
- Below is the OutPut (Target table) After Mapping Process
