FLAT FILE:
A flat file is an ASCII text file which is saved with extension .txt, .csv, etc…
Source Analyzer:
Step 1: Go to tools menu –> Source Menu –> Source analyser files from source menu.
-
- Provide the user ID and Password to connect to the DB and to import required tables.
- Import source data from Database.

Target:
Step 2: Go to tools menu –> target menu –> target files from target menu.
-
- Import Target data from file(.csv,.txt) location or Create the file if no flat file exists as shown in the below steps.
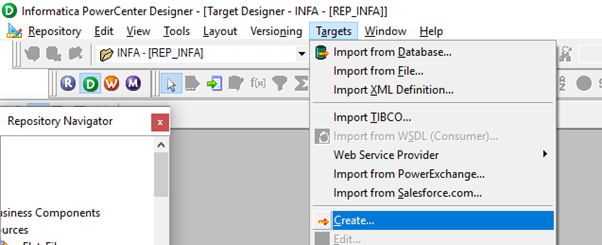
- Go to Targets and select Create Option as shown below Screenshot.
-
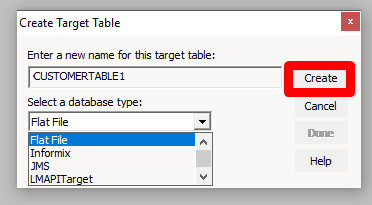
- After click on the Create option the below window will be opened and provide a Target table name and select the appropriate database type and Click on Create as shown below screenshot:
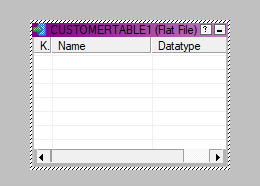
After creating the Target table, the following empty Table will be created.
-
- We have to edit the empty Target table by double-clicking and provide the below information by clicking on the Edit button as shown below screen shot and provide the Column names data types:
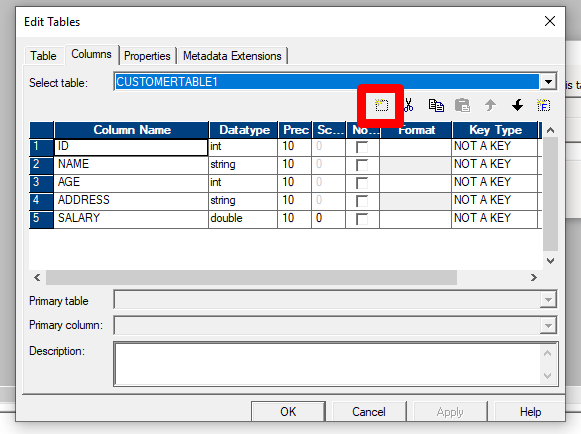
-
- After Clicking on ok we will see the below screenshot with a respective table of data information. Click on Done.

Mapping:
Create Mapping with the respective name (ex:m_CUSTOMERFLATFILE), m_ is a naming convention for mapping creation.
Have create two pipelines, one is to generated headers and second is to load actual data.
Flow one:
-
- Pick only one row from source query with below query:
SELECT ID,NAME,AGE,ADDRESS,SALARY FROM CUSTOMERS where rownum<2;
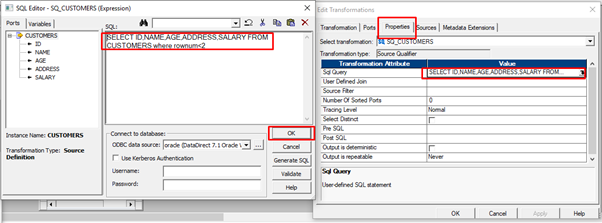
-
- Next expression transformation adds the names of the fields to variable port in order to generate second header line.
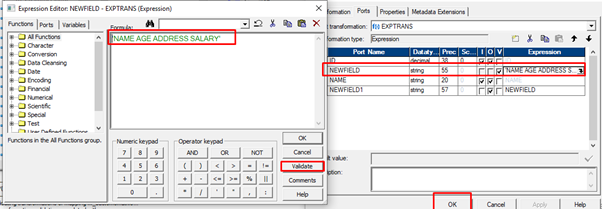
-
- Pass that port to the target file.

FLOW TWO:
The data load order of the mapping: flow one should run first to create the header, To load the actual data in the flat file please follow the below steps:
-
- Create a second flow to load actual data in the flat file:

-
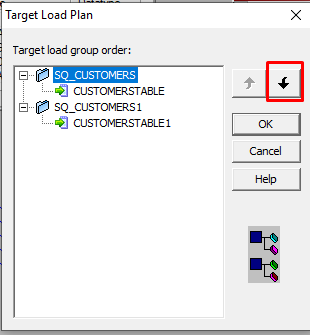
- Go to mapping –>then target load plan as shown below.
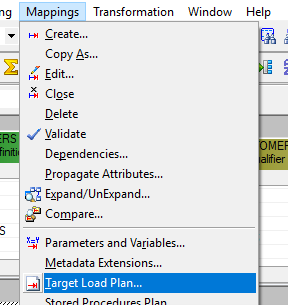
-
- Make sure flow one is on top as mentioned below by changing the order using side arrow as shown below:
Save mapping.
Workflow Manager:
Workflow:
Go to Workflow manager à to create workflow and session for the mapping process.
Session:
Go to Workflow manager à to create a task for the session in the mapping process.
Create a link between session and worklet as shown in below screenshot. Save the workflow designer.

EDIT TASK:
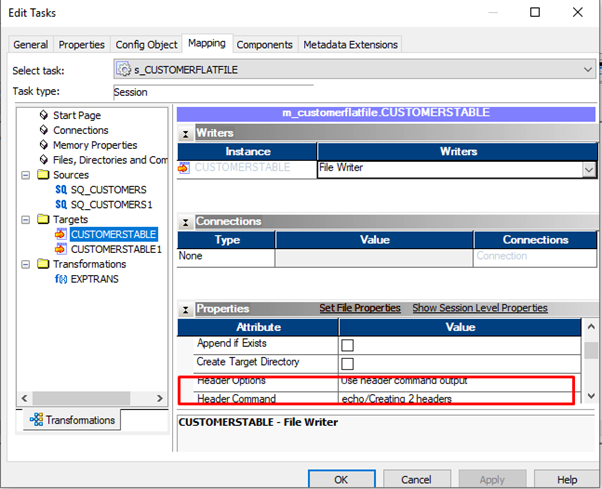
Go to Workflow->Rght click on Session-> Edit Mapping->select flow one Target file i.e
Step1:CUSTOMERTABLE->Edit Attribute.
Under header option select “use header command output” then in next row under Header Command write header one which you want to show as first header name (ex: ”echo/creating 2 headers”) as shown below Screen Shot.
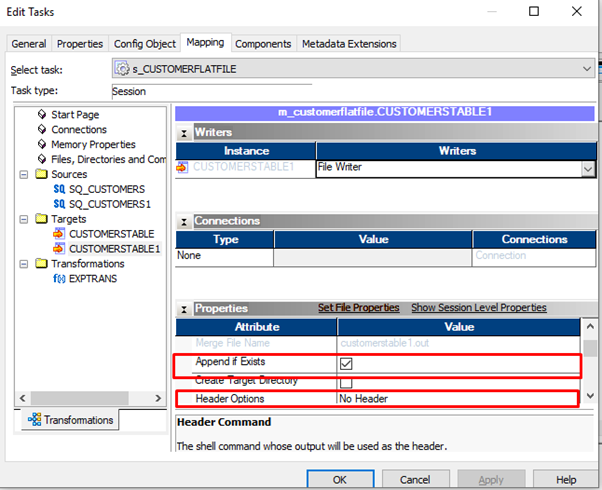
Step2: from the flow two target table i.e CUSTOMERTABLE1->Edit Attribute.
Select Append if exists, As shown below screenshot, select ok.
Note: Make sure both flow one and flow two target file names should be the same.
Save Workflow and Right click on Session for getting Workflow monitor for output details, as shown below.

OUT PUT:
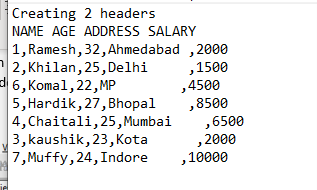
Please find the below Screen shot for Flat file generated with 2 headers.
